Elements
Templates
- Input Field (Default or Multiline)
- Text
- Checkbox
- Choice Group
- Button
How to change the template?
Feel free to draft using the Default Element template; you can change it afterward, Element → Change Template.
Options
Elements can have the following settings (they can be combined).
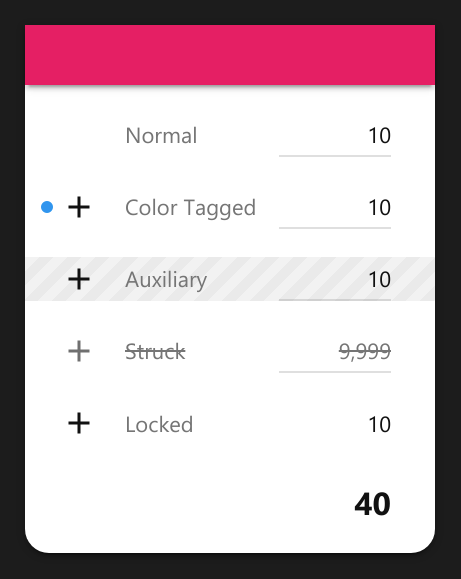
Hide in Designer
Like Groups, Auxiliary Element means that its Hide in Designer option is turned on.
Tip Auxiliary Elements can be hidden in the Drafter Workspace too, View → Hidable Elements.
Strikethrough
Besides the different style, Formulas ignore struck Elements. This option doesn’t imply read-only, see Locked in Designer for that.
Locked in Designer
Prevents modifying or the click action of the Element.
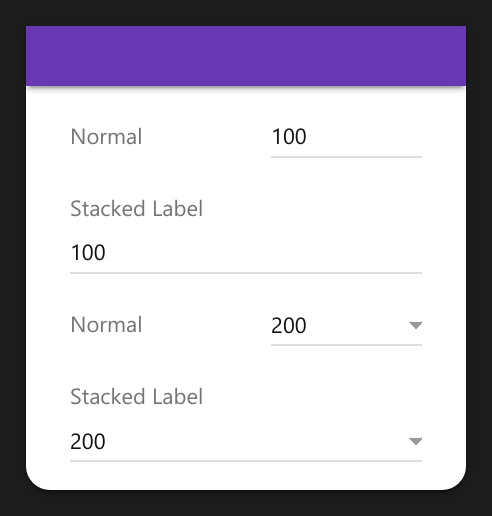
Stacked Label
More Settings → Stack Label can be handy in cases where the Element Label or Value is long.
How to Insert Elements?
Option 1: Drop an Element Template into a Group.
Option 2: Click an Element Template. If an Element is selected, it creates one after it. Otherwise, at the end of the selected Group.
Option 3: Ctrl ⌘ i (works like option 2).
Option 4: Drop a Connection into an empty Group region.
Keyboard Modifiers
These modifiers work for the first three options.
- ⌥ Alt for a Text Template
- Shift for a Multiline Template